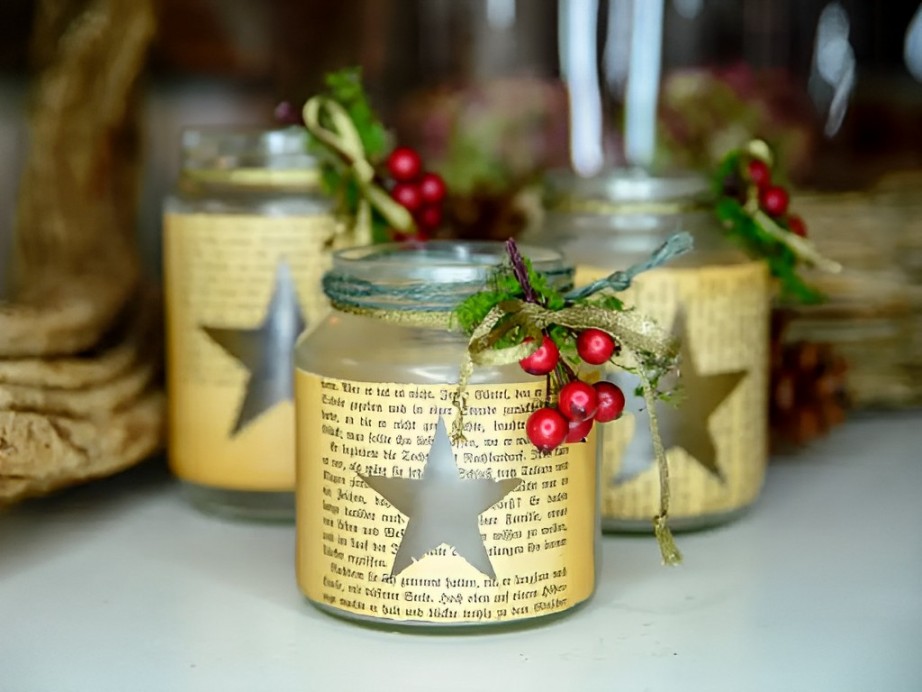
The bar’s decor is coming together nicely, and I’m enjoying the process of finding inventive ways to showcase our favorite items! Two of our favorites: Proper Twelve Irish Whiskey (for him) and candles (for me). So I literally fused those two elements together and created some candle bottle decor that I totally adore.
Supplies for melted candles:
Whatever steps you take, ensure you place aluminum foil beneath the bottles. I may have learned this the hard way, just maybe.
I discovered this box of candles at At Home. Candles that are 10-12 inches long will be suitable. To fit the candles into the bottles, briefly hold a lighter to the base of the candle to warm it. After a few seconds, insert it into the bottle and gently twist while applying slight pressure downward. You’ll notice it pushes the candle in and helps you align it straight.
Now, here’s where the challenge arises. Nowadays, taper candles are designed to not drip everywhere. Kudos to the modern-day candle makers for improving things, thus complicating matters. 🙁
There are several methods to encourage the wax to drip down the sides. Essentially, you need to create a channel for the wax to flow. After some experimentation, I found that lighting another candle to create this channel while also using wax from the candle I was holding yielded the best results.
Don’t fret if that was unclear. The gist is that you need to assist the candles to allow the wax to drip. Using a lighter or another candle is the most efficient approach. Melt it to your liking, and you’re all set!
I’m extremely happy with how they turned out! It’s just the rugged candle bottle decor I needed for some shelves. I can’t wait to share more of the bar area with you! Remember, I post many updates on Instagram if you’d like to follow along!
<!–
–>
# Guide to Crafting Decorative Candle Bottles
Creating decorative candle bottles is a delightful and innovative way to enhance your home ambiance, craft personalized gifts, or even kickstart a small craft venture. By transforming glass bottles into unique candle holders, you can produce eye-catching decor pieces that showcase your personal style. This guide will lead you through the detailed process of making decorative candle bottles, from selecting materials to applying finishing touches.
—
## **Materials Required**
Before you start, gather the following materials:
### **Essential Supplies:**
– Empty glass bottles (wine, liquor, or soda bottles are ideal)
– Candle wax (soy, paraffin, or beeswax)
– Candle wicks
– Wick holders or adhesive wick stickers
– Fragrance oils (optional)
– Dye or color blocks (optional)
– A double boiler or microwave-safe container
– Thermometer
– Funnels or pouring pitchers
– Scissors
### **Decorative Additions:**
– Paint (acrylic or glass paint)
– Decoupage glue (like Mod Podge)
– Decorative paper or fabric
– Twine, ribbons, or lace
– Beads, charms, or stickers
– Glass etching cream (for frosted appearances)
—
## **Step-by-Step Instructions for Making Decorative Candle Bottles**
### **Step 1: Prepare the Glass Bottles**
1. **Clean the Bottles:** Thoroughly wash the bottles with warm, soapy water to eliminate any labels, glue, or residue. Allow them to dry completely.
2. **Cut the Bottle (Optional):** If you wish to create an open-top candle holder, use a glass cutter to trim the bottle to the desired height. Smooth the edges with fine-grit sandpaper.
3. **Decorate the Exterior:** Prior to pouring the wax, embellish the bottle as desired. You can:
– Paint the bottle using acrylic or glass paint.
– Use decoupage glue to adhere decorative paper or fabric.
– Apply glass etching cream for a frosted finish.
– Wrap twine, lace, or ribbons around the neck for a rustic touch.
—
### **Step 2: Prepare the Candle Wax**
1. **Melt the Wax:** Utilize a double boiler or microwave to melt the candle wax. Heat to the specified temperature (generally around 170-180°F for soy wax).
2. **Add Fragrance and Color:** If you choose, incorporate fragrance oils and dye once the wax is fully melted. Stir well for even distribution.
—
### **Step 3: Insert the Wick**
1. **Attach the Wick:** Secure the wick to the bottom of the bottle using a wick sticker or a small amount of melted wax.
2. **Hold the Wick Steady:** Maintain the wick centered while pouring the wax using a wick holder or a pencil.
—
### **Step 4: Pour the Wax**
1. **Carefully Pour the Wax:** Utilize a funnel or pouring pitcher to gradually pour the melted wax into the bottle. Leave about half an inch at the top.
2. **Let It Cool:** Allow the wax to cool and solidify completely. This may take several hours.
—
### **Step 5: Trim the Wick and Finalize Decorations**
1. **Trim the Wick:** Cut the wick to around ¼ inch to ensure a clean burn.
2. **Add Additional Decorations:** Once the candle has set, you can add final decorative touches, such as tying a ribbon around the neck or attaching charms.
—
## **Success Tips**
– **Use Heat-Resistant Glass:** Ensure that the bottles utilized can endure the heat from burning candles.
– **Experiment with Scents and Colors:** Try diverse fragrance combinations and hues to create unique candles.
– **Recycle and Repurpose:** Use old wine or liquor bottles to create eco-friendly decorative candle holders.
– **Safety First:** Never leave candles unattended while burning, and position them on a heat-resistant surface.
—
## **Conclusion**
Crafting decorative candle bottles is a fun and gratifying DIY project that enables you to express creativity while producing lovely home decor or gifts. With just a few simple materials and a dose of imagination, you can convert ordinary glass bottles into striking candle holders that add warmth and charm to any environment.
So, gather your supplies and start crafting your own distinctive decorative candle bottles today!
—
Would you like more ideas for personalizing your candle bottles? Share your thoughts in the comments! 😊