I set up this corkboard wall in a few hours, and I’m excited to share the tutorial with you! The toughest part was worrying about whether it would adhere to the wall (spoiler alert-it did!). So let’s revisit the starting point of this project.
I had shelves on this wall for quite some time, but they ceased to be useful. I absolutely adore travel, so I wanted to showcase the various treasures I’ve amassed over the years. Thus…the corkboard found a place here.
Since using a strong adhesive for the cork roll can be daunting, I preferred not to stick it directly onto the wall. We bought some budget-friendly plywood, cut it to size, and secured it with screws. Remember to cut out spaces for any outlets you might have on the wall!
This is where my husband bowed out, and I took over. The corkboard project was solely mine to handle. It was essentially a one-person task apart from the initial setup. I needed an extra pair of hands to help me align it properly, and then I was off. Once you begin applying the cork to the roll, there’s no room for mistakes. So, make sure to start at a corner and work your way down the wall.
I utilized a notch trowel to spread the adhesive onto the wall and then rolled the cork over it with a rolling pin. I was quite anxious about any bubbles, but the adhesive proved to be fantastic! No bubbles at all.
At the wall’s edge, I used a sharp utility knife to trim along the wall’s edge. It was so sharp that it sliced right through the cork and my thumb. Nothing a quick visit to the emergency clinic couldn’t resolve!
To complete the look, I painted a corner trim piece to match the wall and applied a small bead of wood glue for adherence. Since the cork is thin, it snugly fit against my crown molding and baseboards. Nobody would ever guess it isn’t trimmed at the top and bottom edges, which saved me a lot of time!
Alright. Are you ready for your materials list? It’s concise and straightforward but crucial to use the right items.
Corkboard materials list
- Cork. I scoured various places for the perfect roll. There are so many varieties you could choose from, but I wanted NO seams. Because of that, I spent a bit more. I found cork rolls at Bangor Cork. They had the best prices and a wide selection! I bought a roll and had it cut to 8 feet-the height of my ceilings. Seriously, spending a little extra was worth it because it looks so seamless!
- Notch trowel. It doesn’t have to be anything fancy–just something with teeth to spread the adhesive on the wall and give the cork something to adhere to.
- Flooring Adhesive. This was the highlight of the process. It was forgiving enough to allow for some adjustment, but once it set, it was immovable! I was relieved because, as I mentioned earlier, I was concerned this could turn out badly. Yay for not failing! 😉
- Utility Knife. If you’re aiming to cut your thumb off, might I suggest this utility knife? Just kidding-sort of-but this knife is exceptionally sharp. It did exactly what I needed!
- Rolling Pin. Another hero was my old rolling pin. It made smoothing the cork so much easier.
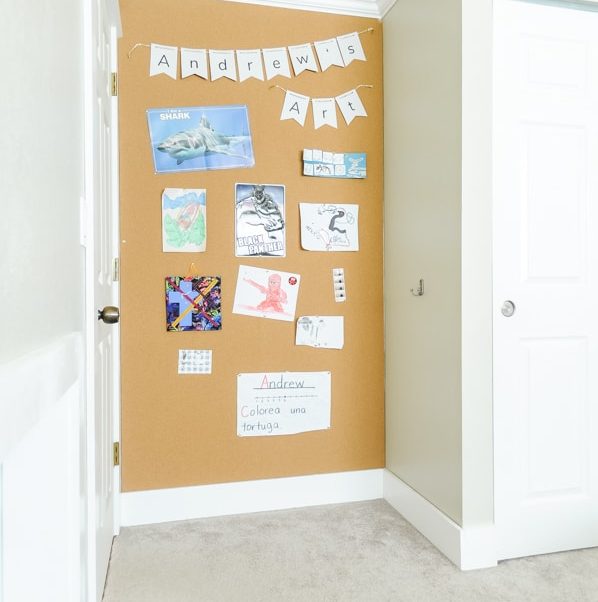
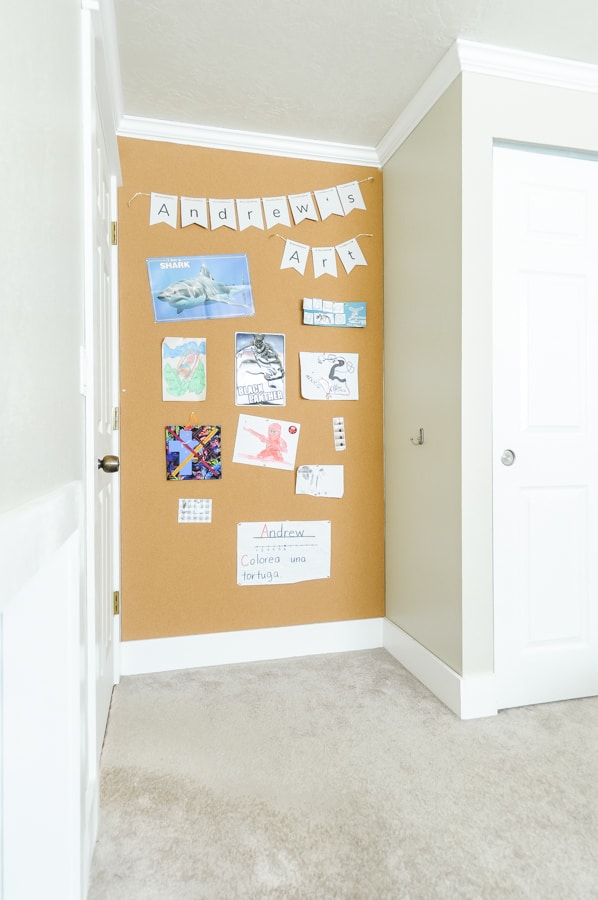
After all those unflattering iPhone photos, here’s a better one to showcase the completed corkboard wall.
I’m really pleased with it, and I hope the instructions were clear! If you want to see more of the finished corkboard wall, check it out here!
<!–
–>
**Step-by-Step Instructions for Installing a Corkboard Wall**
Building a corkboard wall is a functional and chic method to organize your space, whether in an office, classroom, or at home. This guide will take you through the steps of creating a corkboard wall, turning any room into a practical and creative space.
**Required Materials:**
1. Corkboard panels or rolls
2. Measuring tape
3. Pencil
4. Level
5. Utility knife or scissors
6. Adhesive (corkboard adhesive or double-sided mounting tape)
7. Roller or flat object for smoothing
8. Ruler or straightedge
9. Sandpaper (optional)
10. Paint or primer (optional)
**Step 1: Plan Your Corkboard Wall**
– Decide on the dimensions and placement of your corkboard wall. Measure the space where you’ll install the corkboard.
– Choose whether to cover the entire wall or just a part of it. Keep in mind the thickness of the corkboard; thicker cork offers better support for pinning.
**Step 2: Prepare the Wall**
– Clean the wall area thoroughly to remove any dust and debris. A clean surface aids in better adhesion.
– If the wall has irregularities, consider sanding it or applying a primer to create a flat surface.
**Step 3: Cut the Corkboard**
– Measure and mark the corkboard according to your wall’s measurements.
– Use a utility knife or scissors to cut the corkboard to the required size. Employ a straightedge or ruler to ensure precise, straight cuts.
**Step 4: Apply Adhesive**
– If you’re using corkboard adhesive, apply it to the back of the corkboard panels or directly onto the wall using a trowel.
– For double-sided mounting tape, evenly place strips across the back of the corkboard.
**Step 5: Install the Corkboard**
– Begin in one corner, aligning the corkboard with the wall, and press it firmly into position.
– Use a level to make sure the corkboard is straight. Adjust as necessary before the adhesive cures.
– Eliminate any air bubbles by using a roller or flat object, pressing firmly to create a solid bond.
**Step 6: Complete the Installation**
– If installing multiple panels, tightly butt the edges together to achieve a seamless appearance.
– Trim any excess corkboard with a utility knife for a neat finish.
**Step 7: Optional Finishing Touches**
– If desired, paint or add a decorative border around the corkboard for enhanced aesthetics.
– Allow the adhesive to cure according to the manufacturer’s instructions before using the corkboard.
**Conclusion**
Installing a corkboard wall is an easy project that can greatly improve the utility and look of your space. By following these steps, you can create an adaptable area for pinning notes, photos, and other important items. Whether for personal or professional use, a corkboard wall is a great addition to any room.