The bar’s decor is progressing well, and I’m enjoying the process of discovering imaginative ways to showcase things we cherish! Two favorites of ours: Proper Twelve Irish Whiskey (for him) and candles (for me). So, I literally combined those two elements and created some candle bottle decor that I’m really fond of.
Supplies for melted candles:
Whatever you do, ensure you place aluminum foil beneath the bottles. I may have learned this lesson the hard way—no promises.
I discovered this box of candles at At Home. Candles measuring 10-12 inches will suffice. To insert the candles into the bottles, warm the bottom of the candle using a lighter. After a few moments, place it into the bottle and twist while gently applying downward pressure. This will help in forcing the candle in and aligning it properly.
Now, here’s where the issue arises. Today’s taper candles are designed so they don’t drip everywhere. Kudos to modern candle makers. Thanks for improving things but complicating them at the same time. 🙁
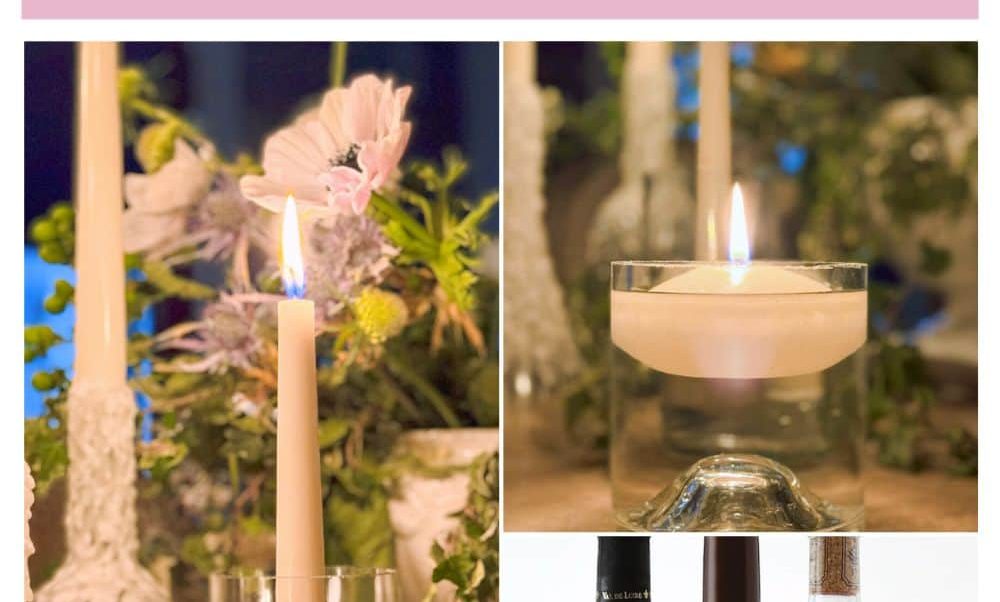
There are various techniques to actually enable the wax to drip down the side. Essentially, you need to create a pathway for the wax to flow. After some experimentation, I concluded that lighting another candle to create the channel while simultaneously using wax from the candle I held was the most effective method.
Do not fret if this seems unclear. In essence, you just need to assist the candles in allowing the wax to drip. Utilizing a lighter or another candle is the most effective approach. Melt it until you achieve the desired appearance, and you’re set!
I’m incredibly happy with how they turned out! It’s precisely the rugged candle bottle decor I required for some shelves. I’m excited to reveal more of the bar area to you! Remember, I frequently post updates on Instagram if you wish to follow my journey there!
<!–
–>
Crafting decorative candle bottles is a delightful and imaginative method to repurpose old glass bottles while adding a charming flair to your home. This project is ideal for craft enthusiasts looking to customize their surroundings with one-of-a-kind, handmade creations. Here’s a detailed guide on how to create your very own decorative candle bottles.
### Required Materials:
– Empty glass bottles (such as wine bottles, soda bottles, etc.)
– Candle wax (options include soy, paraffin, or beeswax)
– Candle wicks
– Wick holders or wick stickers
– Double boiler or heat-safe container for melting wax
– Fragrance oils (if desired)
– Dye chips or liquid candle dye (optional)
– Decorative items (like paint, ribbons, twine, stickers, etc.)
– Funnel
– Scissors
– Hot glue gun (optional)
### Step-by-Step Directions:
#### Step 1: Prepare the Bottles
1. **Clean the Bottles:** Take off any labels and adhesive remains from the bottles. Soaking them in warm, soapy water can help simplify this process. If necessary, utilize a scrubber.
2. **Dry Completely:** Make sure the bottles are thoroughly dry before moving on to the next step.
#### Step 2: Decorate the Bottles
1. **Paint and Create Designs:** Use acrylic paint to craft designs on the bottles. You may use stencils for specific patterns or paint freely. Allow the paint to dry fully.
2. **Incorporate Decorative Features:** Attach twine or ribbon around the bottle neck for a rustic aesthetic. Use a hot glue gun to fasten embellishments such as beads, charms, or stickers.
#### Step 3: Prepare the Candle Wax
1. **Melt the Wax:** Melt the candle wax using a double boiler. If a double boiler is unavailable, place a heat-safe container in a pot of simmering water.
2. **Add Fragrance and Dye (Optional):** After melting the wax, integrate any fragrance oils and dye as desired. Stir well for even mixing.
#### Step 4: Insert the Wick
1. **Secure the Wick:** Use a wick holder or wick sticker to attach the wick to the bottom of the bottle, ensuring it remains centered.
2. **Keep the Wick Upright:** Use a pencil or chopstick to maintain the wick’s vertical position while pouring in the wax.
#### Step 5: Pour the Wax
1. **Utilize a Funnel:** Carefully pour the melted wax into the bottle using a funnel, leaving about one inch of space at the top.
2. **Allow It to Set:** Let the wax cool and harden completely, which may take several hours.
#### Step 6: Trim the Wick
1. **Snip the Wick:** Once the wax has fully set, trim the wick to approximately 1/4 inch above the wax surface.
### Tips for Success:
– **Prioritize Safety:** Exercise caution when handling hot wax and open flames. Use protective equipment as necessary.
– **Be Creative with Designs:** Experiment with various bottle shapes and sizes. Mix colors and scents to develop a unique collection.
– **Gift Consideration:** Decorative candle bottles make fantastic gifts. Customize them for specific occasions or holidays.
Creating decorative candle bottles is not only an enjoyable and fulfilling project, but it is also an eco-friendly way to reuse glass bottles. With a burst of creativity and effort, you can turn ordinary bottles into stunning, functional art pieces that bring warmth and style to your space.